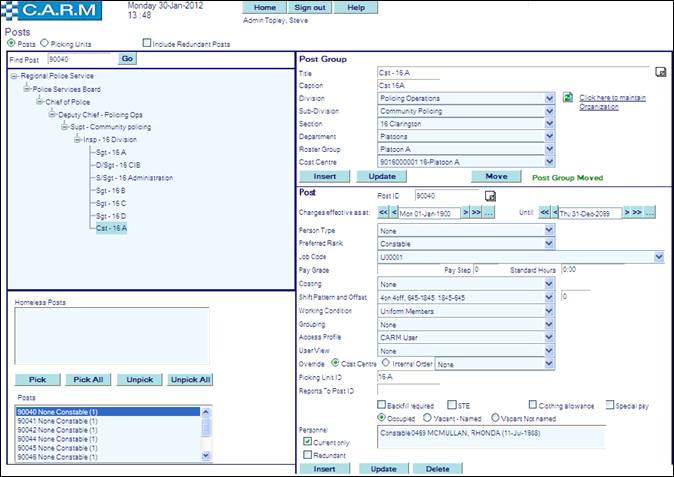
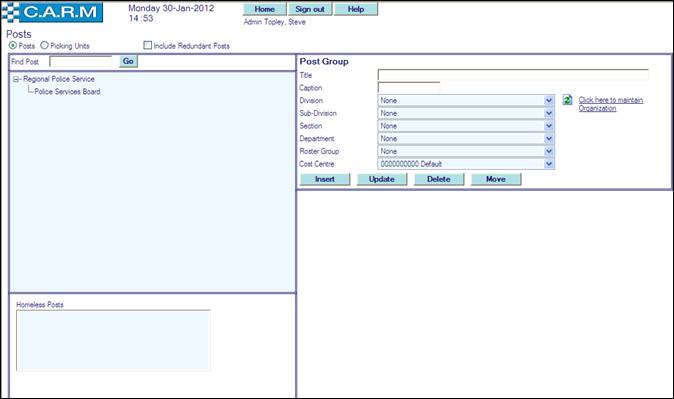
Posts
Moving a post between Picking Units
Creating Post Information
This facility allows you to define the organization structure with all lines of reporting/authority and other post related information. It also enables tracking of vacancies and specifying information for acting personnel.
· Select Personnel Maintenance > Posts
· Select Posts
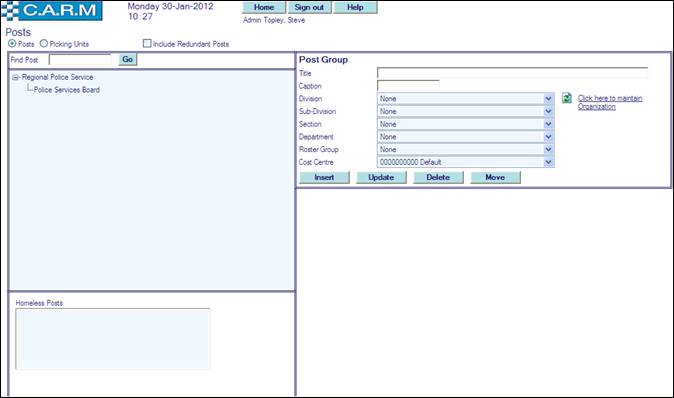
Open a new window (Click here to maintain Organisation) to maintain Organization operational structure and to then refresh the structure drop down lists whilst maintaining Post Groups.
Any posts that have not been allocated to a part of the organization will be listed in the Homeless Posts list.
Either search for a Post in the organization, or expand the organization structure as necessary to show the organization.
To expand the organization, simply click on the part of the organization that is to be expanded down to the next level (if one exists)
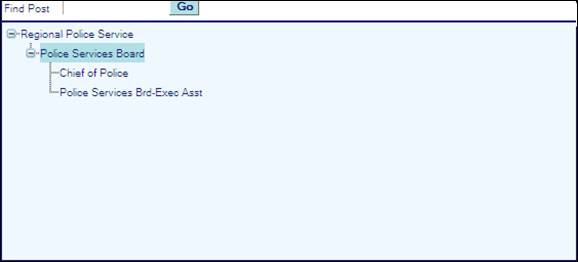
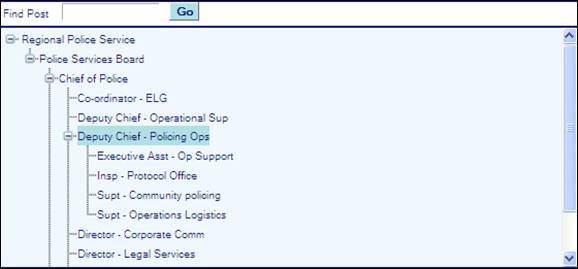
To search for a post, enter Post ID in 'Find Post' and click Go
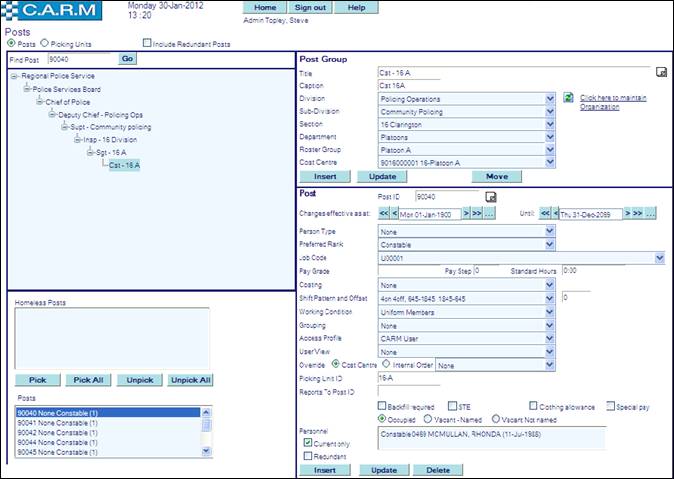
Structure will be expanded to show the selected Post (e.g. 90040 above)
Shows the following details about the Post Group (e.g. group the post belongs to)
· Title e.g. Cst -16A
· Caption
· Operational Organization Structure
· Cost Centre
· List of Posts in this group
It shows the following details about the Post
· Post ID e.g. 90040
· Personnel Type (see Lookup Tables)
· Preferred Rank for the post (see Ranks)
· Job Code (see Job Codes)
· Pay Grade, Pay Step and Standard Hours (Weekly).
· Costing (see Lookup Tables)
· Shift Pattern and Offset
· Working Conditions
· Grouping
· Access Profile (see Users)
· User View
· Overide choice of Cost Centre or Internal Order
· Picking Unit ID e.g. Cst -16A
· Backfill required check box.
· Reports To Post ID
· STE check box
· Clothing allowance check box.
· Special pay check box.
· Selection of Occupied, Vacant – Named or Vacant Not Named
· All Personnel who have or will hold this post with dates occupied. If Current only is checked, only currently filled positions will be shown.
· Redundant check box
Creating a Post Group
Create a Post group, select part of the organization that the new post group is subordinate to.
Enter the post group details and click Insert (Post Group)
· Enter Title.
· Enter Caption.
· Enter Division, Sub-division, Section, Department and Roster group from drop down lists.
· Enter Cost Centre from drop down list.
· Click Insert (Post Group).
Deleting a Post Group
A post group may only be deleted if there are no posts in that group and there are no subordinate post groups. Such subordinate post groups will need either deleting or moving to a new superior post group. Any posts in that group will need either deleting or moving to 'Homeless Posts'.
When a Post group is available to be deleted, a Delete button will be visible
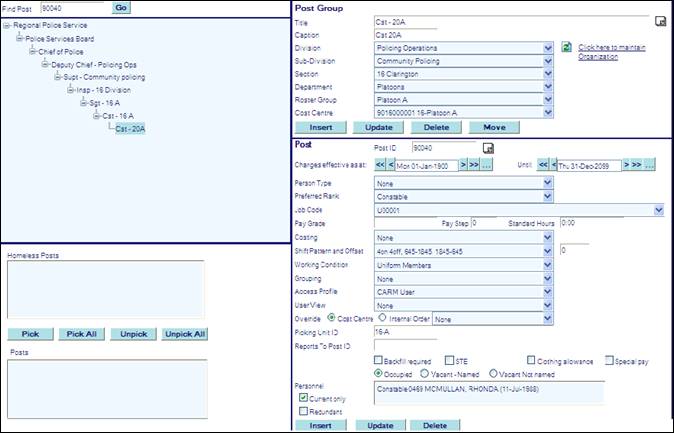
Click the Delete button to remove that post group.
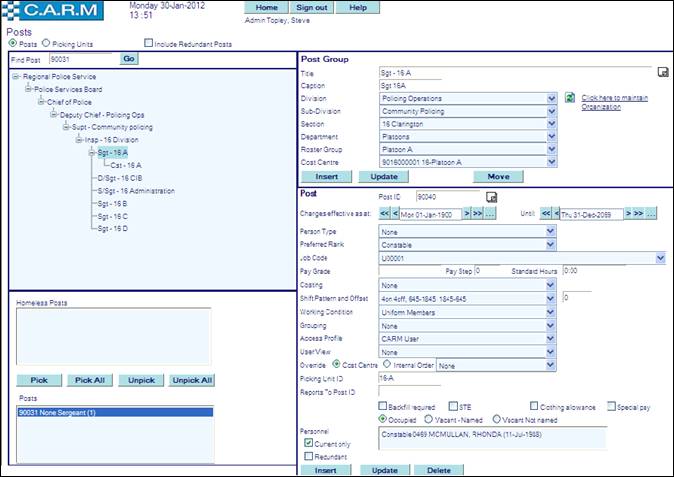
Moving a Post Group
A post group may be moved to a new superior post group.
Select Post Group to be moved and click Move
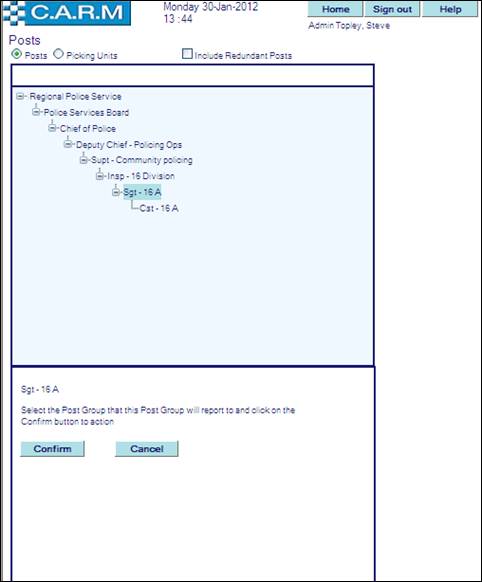
Select the new superior group for the selected post group and click on Confirm. (Click on Cancel to cancel this move). An error will be displayed if you try to move a group to itself or any of its subordinate groups throughout the depth of the structure.
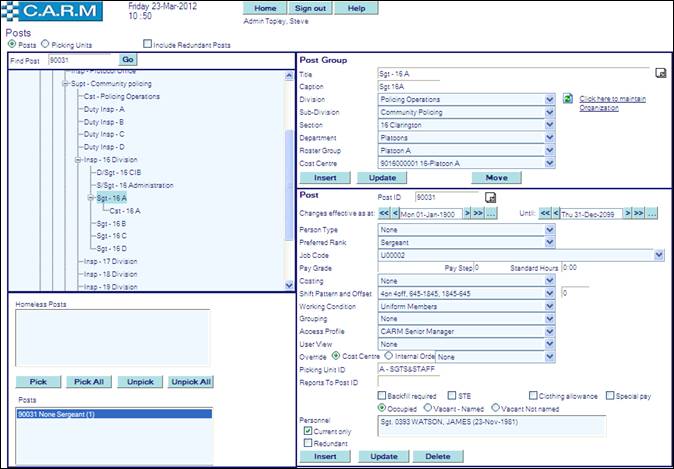
Creating a Post
Create a new Post, select part of the organization that the new post is subordinate to.
Enter post details and click Insert (Post)
· Enter Post ID.
· Enter Person Type from drop down list.
· Enter Preferred Rank from drop down list.
· Enter Job Code from drop down list.
· Enter Costing from drop down list.
· Enter Pay Grade, Pay Step and Standard Hours (Weekly).
· Enter Shift Pattern from drop down list and enter offset in box
· Enter Working Condition from drop down list.
· Enter Grouping from drop down list.
· Enter Access Profile from drop down list.
· Enter Picking Unit if required.
· Select Backfill required if required.
· Select Clothing allowance if required.
· Select Special pay if required.
· Select Occupied, Vacant-Named or Vacant Not named.
· If Vacant Not named is selected then check Actioned and/or Advertised if required.
· Click Insert (Post)
· Redundant check box (See Removing items from a users view)
Deleting a Post
Select Posts to be deleted.

Click the Delete button to remove that Post.
Moving a Post
To move Posts to a different post group. Select Posts to be moved and first move them to 'Homeless Posts' List

Select Posts and click Unpick to move them to Homeless Posts list. Click Unpick All to move all listed posts to the Homeless Posts list.
Select the new Post group to move the Posts to. Select the appropriate posts from the Homeless Posts List and click Pick to move them to the new post group. Click Pick All to move all Homeless Posts to the new post group.
Managing Picking Units
Picking Units are specified groups of Posts, as units, for use when checking for absence thresholds e.g. Annual leave. Persons in a ‘Picking Unit’ will be checked for threshold levels when authorizing absence requests or when making annual leave picks. If there are no Picking Units defined, then existing processing continues
When Posts ‘Picking Units’ are used, the threshold % limit used is the System Parameter default setting.
Skill Authorization threshold settings remain unchanged.
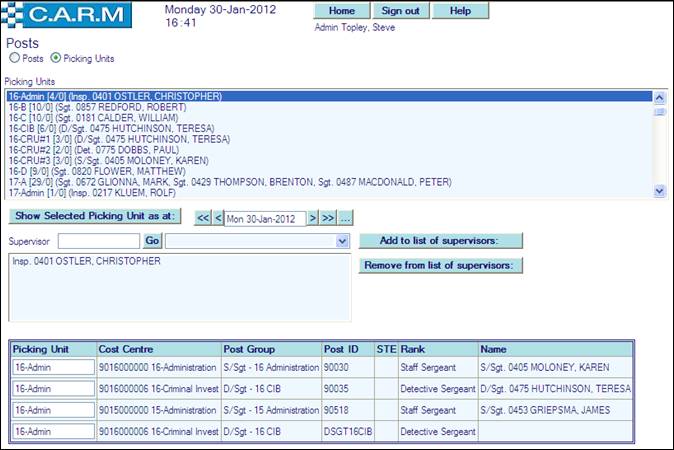
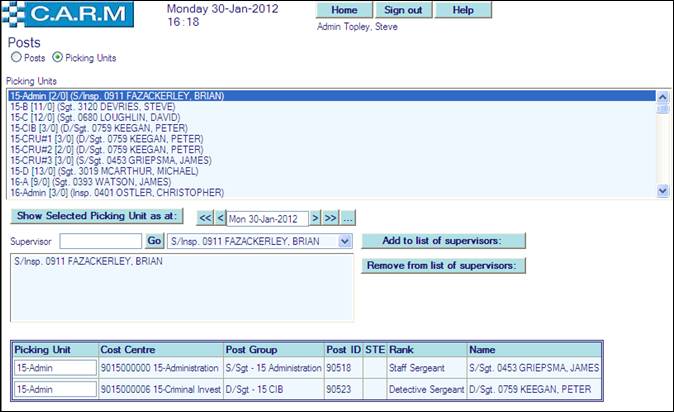
Viewing Picking Units Details
· Select Personnel Maintenance > Posts
· Select Picking Units
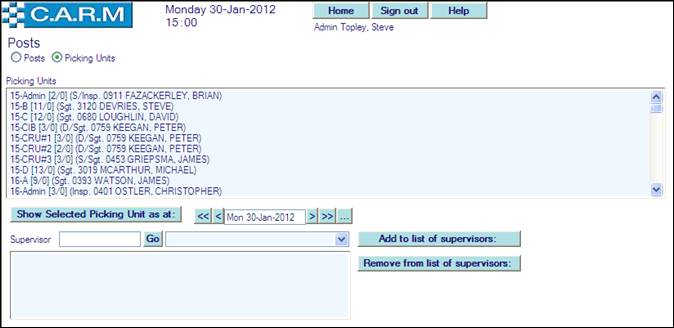
· Select Picking Units required for viewing and/or maintenance.
· Enter date As at.
· Click Show Selected Picking Unit as at:
e.g. single selection
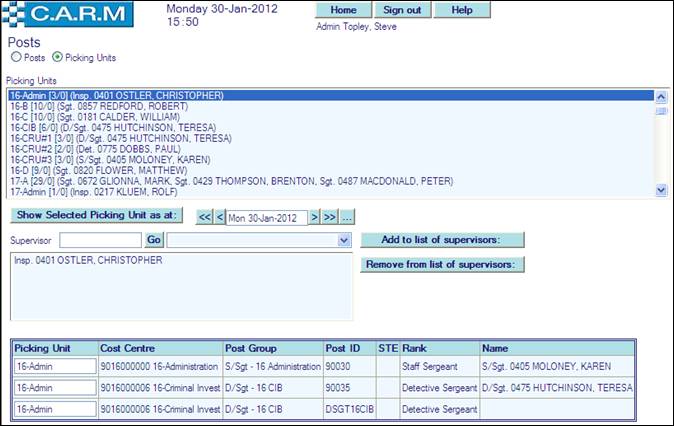
The Grid presented shows:
Picking Unit: ID of the Picking Unit that the post is included in.
Cost Centre: of the Post Group.
Post Group: Title.
Post ID: of the Post.
STE: Surplus To Establishment
Rank: Preferred Rank for the Post
Name: of the Person(s) in the post.
Set Picking Unit Supervisor
A Picking Unit Supervisor is required to check on the status of their picking units, to bypass seniority if required or to pick on behalf of one of the members of their picking unit.
· Select required Picking Unit(s)
· Search for and/or select the required Supervisor from the resulting drop down box.
· Click Add to list of supervisors:
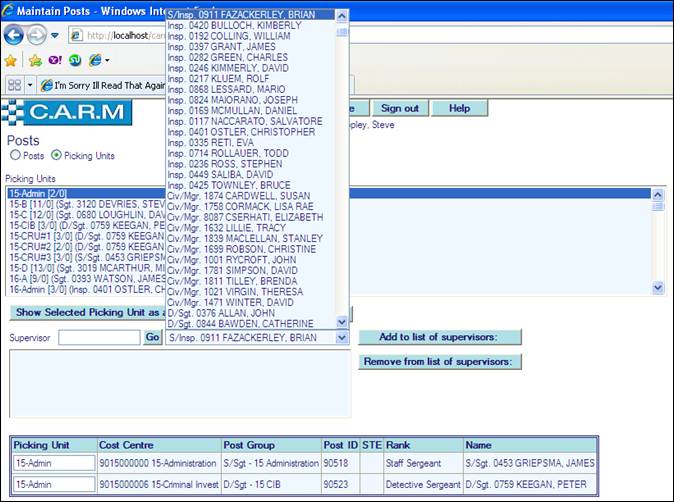
Moving a post between Picking Units
Where a post needs to be moved from one Picking Unit to another Picking Unit:
Select Personnel Maintenance > Posts
There are two methods of moving a Post between Picking Units:
Method 1:
· Select Posts
· Find the Post required.
· Change the current Picking Unit ID to the new Picking Unit ID.
· Click Update (Post)

Method 2:
· Select Picking Units
· Select Picking Units required for checking and/or maintenance. Make single or multiple selections as required.
· Enter date As at.
· Click Submit.
· Change the Picking Unit ID in the grid against the Post ID(s) required to be moved.

· Click Submit.